
Showing posts with label wood. Show all posts
Showing posts with label wood. Show all posts
Friday, May 11, 2012

Monday, February 27, 2012
2x2...inches, that is! Wood Blocks for a deal!
---WE ARE UPDATING OUR WEBSITE. --
MINDY'SMINUTEMARKET.COM WILL BE UNREACHABLE FOR A FEW DAYS--
YOU CAN STILL FOLLOW HERE & ON FACEBOOK.--
MINDY'S MINUTE MARKET
TODAY'S ONLINE DEAL & IDEAS:
 Wooden Baby Blocks


TO PURCHASE:

You will receive 4 {four} 2 inch-by-2inch bare, birch blocks.
4 bare blocks- $5.
Wednesday, February 15, 2012
Grabbin' GABBY...Our Next WAVY FRAME!
TODAY'S ITEM IDEAS:
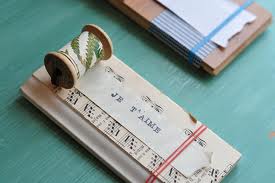
Here's a mini-tutorial of sorts from us (before my new camera)
1. Started with a sheet of scrapbook paper.

2. Traced the frame to the opposite side of the paper and cut it out.
(tracing the inside of the frame- which could be done at the same time as the rest of the frame.)

3. Attatched the paper to the frame using Modge Podge
(I use a thin coat on the frame, place the paper and then use a credit card to press out all the air bubbles)

Some gals painted their frames, before using the Modge Podge. Some also apply another coat of Modge Podge over the frame after they applied the scrapbook paper. Some didn't.


These were the frames from our "Craft Night" kits- they fit perfectly into the candlesticks for a finishing touch.

Wednesday, February 8, 2012


Monday, February 6, 2012
I Love You Because YOU ROCK...Candy, that is.....:)
TODAY'S ITEM:

Here's OUR Contribution:
A Fun Printable to use with your DIY Rock Candy!

(Just right click to copy and paste into Word, etc.)
for the kits for DIY swizzle sticks (saving a fortune, btw!)
Wednesday, February 1, 2012
Welcome to Our First Wavy Frame!
TODAY'S ONLINE ITEM:

"Sharstin"
It's Our First Wavy Frame- to get started, it's a basic frame-
no glass, no hardware.
We will see our response and feedback and
move forward from there!
So let us hear what you want to see!
Monday, January 30, 2012
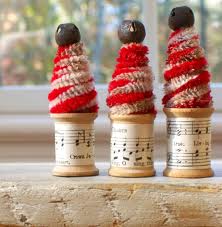
Feelin' Fine with Finials!
TODAY'S ITEM IDEAS:

Added to the bottom of a DIY sconce.


Finishing touch for a cute advent calendar- with a chair leg or pedestal.

Making cute apothecary-type jars- screwing the finial to the lid of a glass jar which will attach to a candle stick with glue.

Trim off the bottom, cut a slit in the top and spray paint for darling placecard holders (or picture holders).

Now this idea is over at Make and Takes- Find the tutorial HERE.
Monday, January 23, 2012


Friday, January 20, 2012


Subscribe to:
Posts (Atom)